
Google Calendar add-on for Pre-Registration and Express QR code Sign-in
With the Virtual Front Desk for Google Calendar add-on, hosts can pre-register their visitors directly from a Google Calendar event, without signing in to the Virtual Front Desk dashboard. It works the same way as the Outlook Calendar add-in: your visitors receive their sign-in form in advance and are expected at the station when they arrive.
How visitors sign in
Visitors can sign in at your station in two ways:
- Sign in at the station: visitors complete the sign-in form on site, at the station.
- Pre-registration: you send the visitor the sign-in form in advance. They complete it on their computer or phone, then receive a QR code or a 4-digit code by email for Express sign-in at the station.

Signing in at the station, or with a pre-registration code
To learn more about sign-in forms and pre-registration, read Visitor sign in, sign out and Express QR code sign in.
Before you start
Each person who uses the add-on needs:
- A Virtual Front Desk account that uses the same email address as their Google account. If they don't have one yet, a Virtual Front Desk admin can invite them from the dashboard.
- Google Calendar on the web (calendar.google.com). The add-on opens in the side panel on the right.
- To be the organizer of the event. Guests of a meeting can open the add-on, but only the organizer can create pre-registrations.
Your organization also needs at least one location and one sign-in form set up in the Virtual Front Desk dashboard.
Install the add-on
The add-on is installed from the Google Workspace Marketplace. Google asks for permission once, during installation.
For your whole organization (Google Workspace administrator)
- In the Google Admin console, go to Apps > Google Workspace Marketplace apps and search for Virtual Front Desk.
- Click Admin install and choose whether to install it for everyone or for specific organizational units.
- Accept the permissions on behalf of your users. The add-on then appears in their Google Calendar without any action on their part.
For yourself
- Open the Virtual Front Desk listing in the Google Workspace Marketplace.
- Click Install and select your Google account.
- Review the permissions and click Allow.
Once installed, the Virtual Front Desk icon appears in the side panel on the right of Google Calendar.
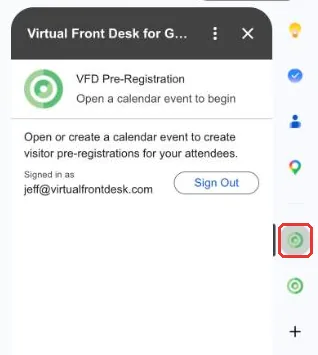
The Virtual Front Desk add-on in the Google Calendar side panel
Permissions: the add-on asks to run inside Google Calendar, to read the event you have open (title, time and guests), to see your email address so it can sign you in, and to connect to Virtual Front Desk.
Sign in
In most cases, you are signed in automatically. When you open the add-on, it matches your Google email address to your Virtual Front Desk account, in whichever region your account is hosted (United States, Canada, Europe or Asia-Pacific). No password is needed.
If you see the Sign In with VFD screen instead:
- Leave Region on Detect automatically, or select your region if you know it.
- Click Sign In with VFD. A login window opens.
- Sign in with your Virtual Front Desk email and password, or with Google or Microsoft if that is how you usually sign in.
- When the window confirms that you are signed in, close it. The add-on refreshes and shows your event.
You stay signed in until you click Sign Out.
Send a pre-registration from Google Calendar
- In Google Calendar, create your meeting and add your visitors as guests.
- Save the event. Google only shares the guest list with add-ons once the event is saved.
- Open the saved event and click the Virtual Front Desk icon in the side panel. The add-on shows the event title, the scheduled visit time and the guest list.
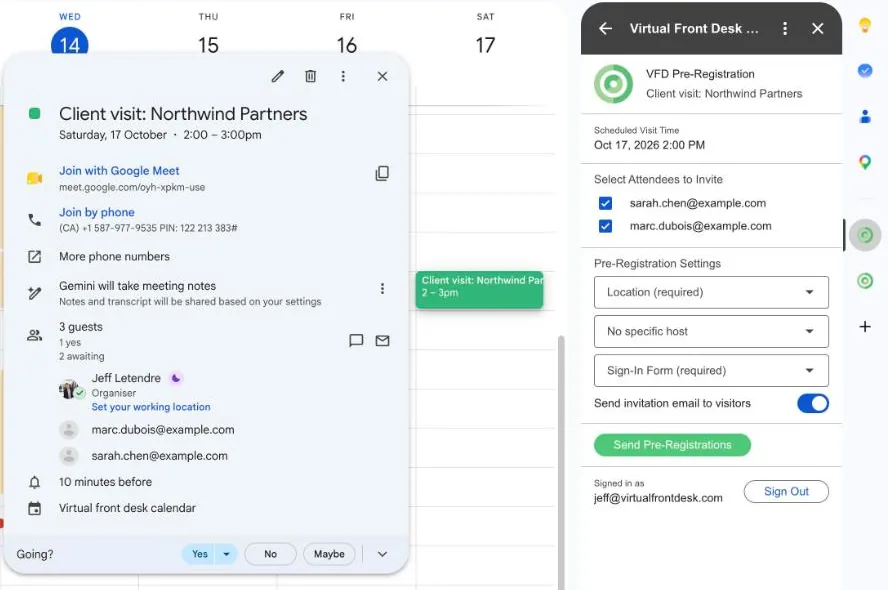
The add-on showing the event, visit time and guests
- Under Select Attendees to Invite, check the visitors you want to pre-register. Uncheck any internal colleagues who do not need to complete a sign-in form.
- Under Pre-Registration Settings, choose the Location (required) the visitors are coming to, the Host they are meeting (or leave No specific host), and the Sign-In Form (required) they will complete.
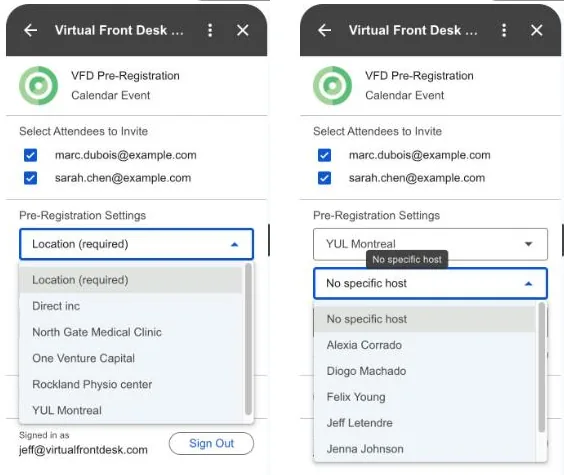
Choosing the location and the host
- Leave Send invitation email to visitors on so your visitors receive an email with a link to complete the sign-in form. Turn it off if you prefer not to email them.
- Click Send Pre-Registrations. A confirmation shows how many pre-registrations were created.
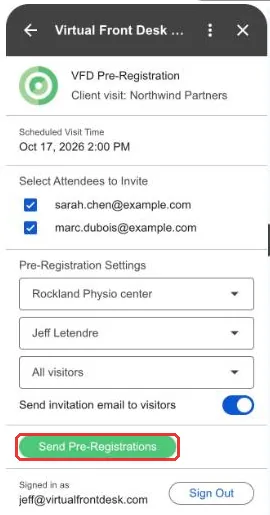
Settings complete, ready to send
Your visitors receive an email with a link to complete the sign-in form. Once they complete it, they receive their QR code or 4-digit code for Express sign-in at the station.
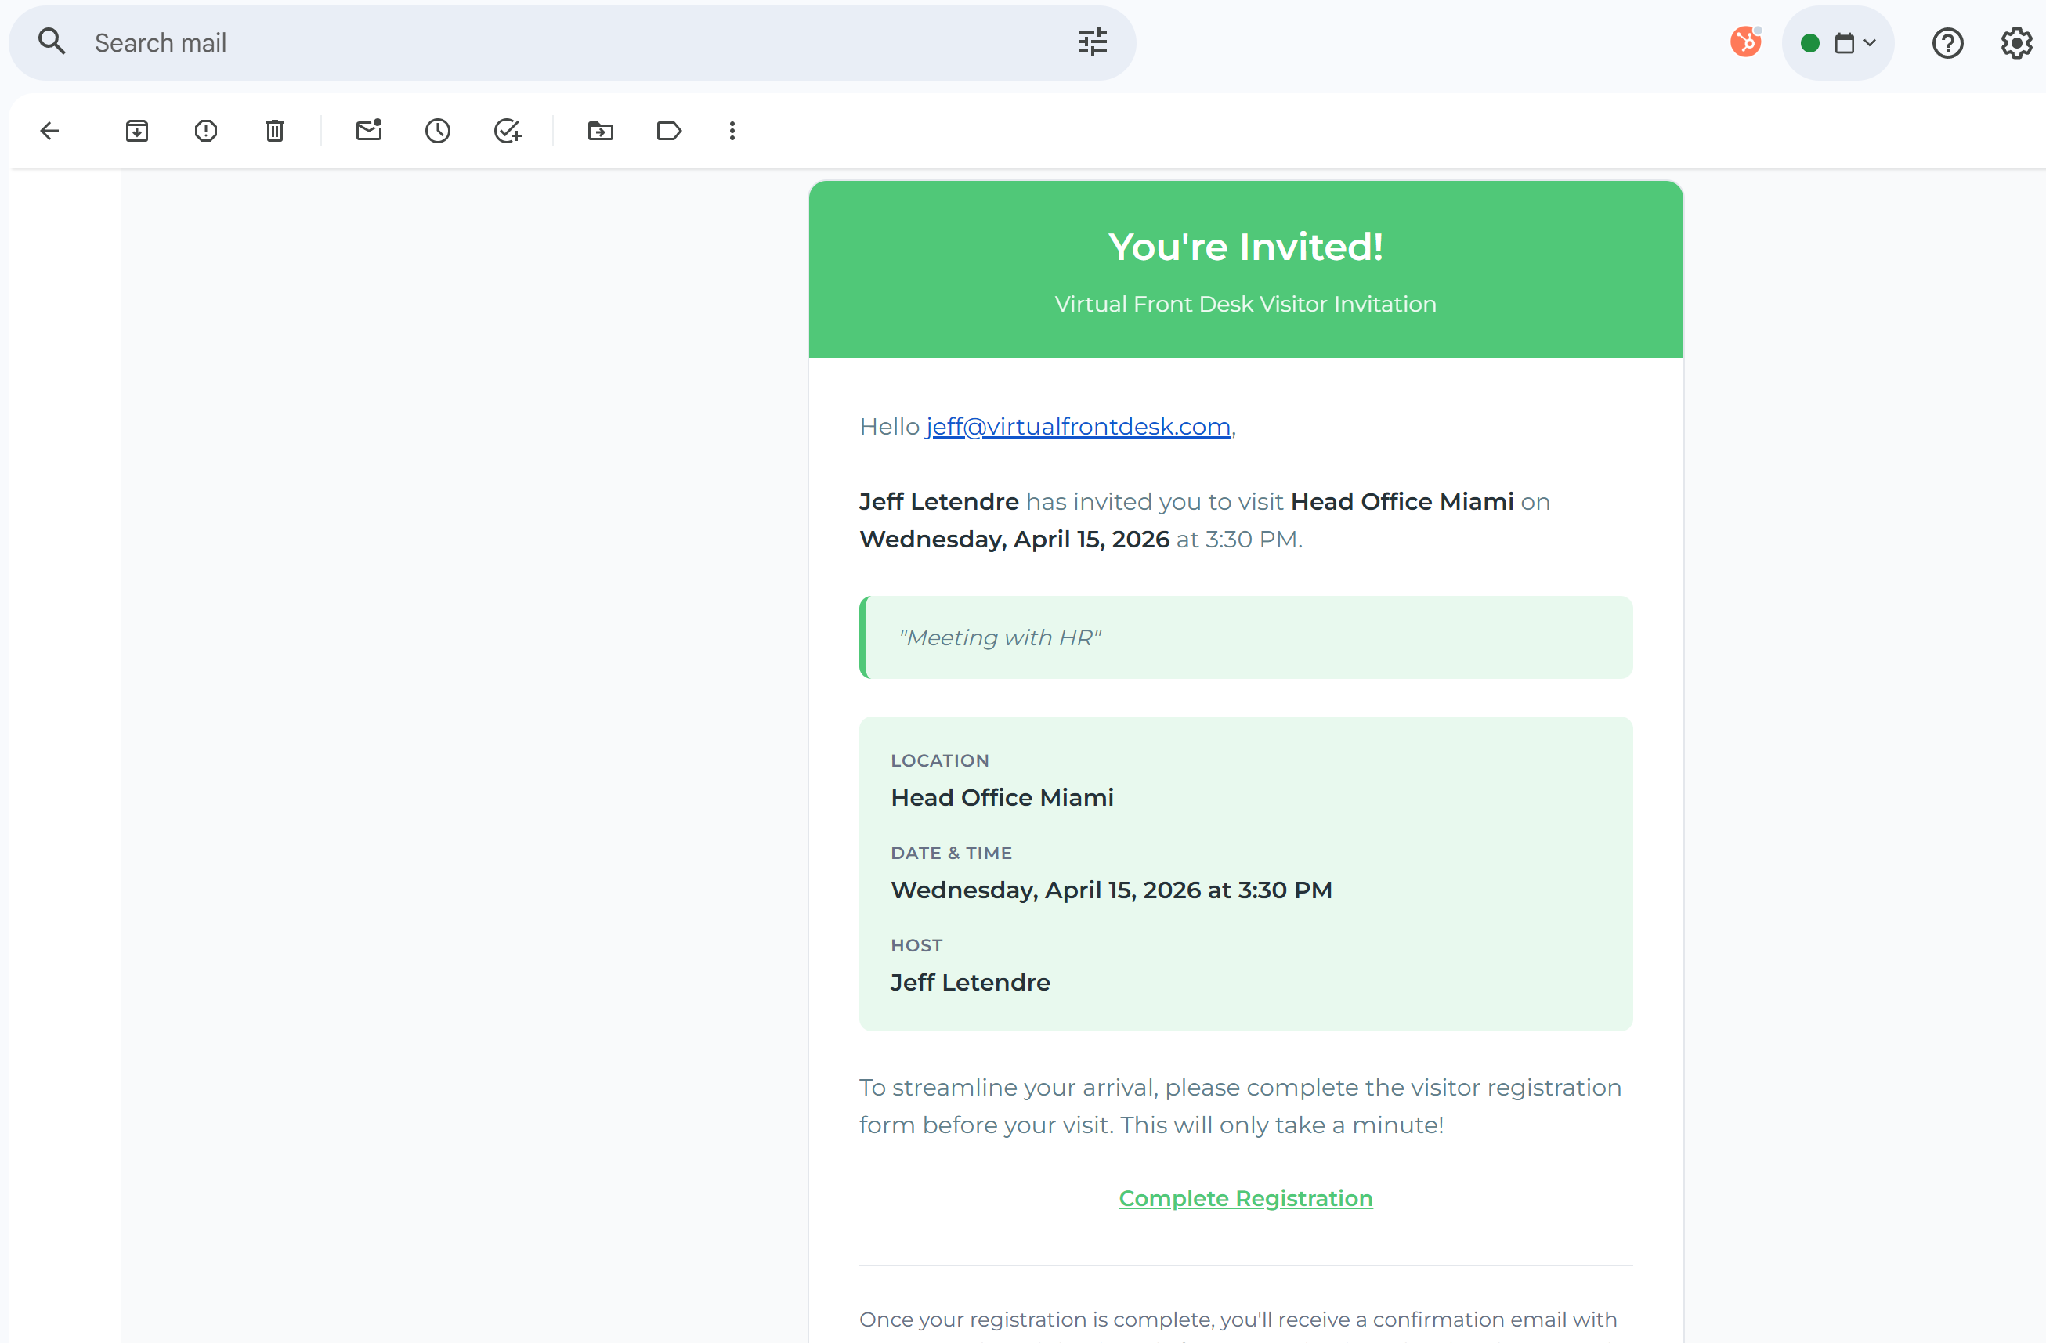
The pre-registration email received by a visitor
Follow your pre-registrations
- See who is already pre-registered: open the event again. Visitors already pre-registered are listed under Existing Pre-Registrations and no longer appear under Select Attendees to Invite.
- Add more visitors later: add them as guests, save the event, open the add-on and send again. Only the new guests are listed.
- Remove a pre-registration: click Delete next to the visitor, then confirm.
- Sign out: click Sign Out at the bottom of the add-on. The next time you open it, you are signed back in automatically.
All pre-registrations are also listed under History > Pre-registration logs in the Virtual Front Desk dashboard.
Troubleshooting
What you see | Why | What to do |
|---|---|---|
"No Virtual Front Desk account found for [your email]" | Your Google email address is not linked to a Virtual Front Desk account. | Ask your Virtual Front Desk admin to invite that email address, or click Sign In with VFD and use another account. |
"Pre-registration management is only available to the meeting organizer" | You are a guest of the event, not its organizer. | Ask the organizer to pre-register the visitor. |
"Google Calendar does not share guest information with add-ons until the event is saved" | The event has not been saved yet. | Save the event, then open the add-on again. |
"No guests found on this event" | The event has no guests. | Add your visitors as guests, save the event and open the add-on again. |
The Location or Sign-In Form list is empty | No location or sign-in form is set up yet, or you don't have access to them. | Ask your Virtual Front Desk admin to add a location and a sign-in form. |
The sign-in screen appears every time | The automatic sign-in cannot find your account. | Use Sign In with VFD with your region selected. If the issue continues, contact Virtual Front Desk support. |